12 Ways to Celebrate the Summer Solstice
There is something magical about the Summer Solstice. The longest day of sunshine in North America embodies so many wonderful things to celebrate- nature’s vitality, life abundant, the intoxicating enchantment of summer dusks and nights. Here are 12 ways to honor this celestial holiday.
Yoga at Sunrise
Reflections at Sunset
Floral Crowns
Nature Print Making
Fresh Lemonade
Try Sumacade
Berry Picking
Pack a Picnic
Go for a Walk in Nature
Make an Ethereal Backyard
Have a Bonfire
Watch an Outdoor Movie
This site intentionally avoids intrusive ads. I provide links to relevant products used in the tutorials as an Amazon Associate. I do when there’s genuinely a value in knowing and sharing the specific product used.Solstice Mediations

1 | Yoga At Sunrise
Wake up early to catch the sunrise, practicing sun salutations in the best of the morning light.
If you are new to yoga or want a refresh- here is a free 15-minute guided session.
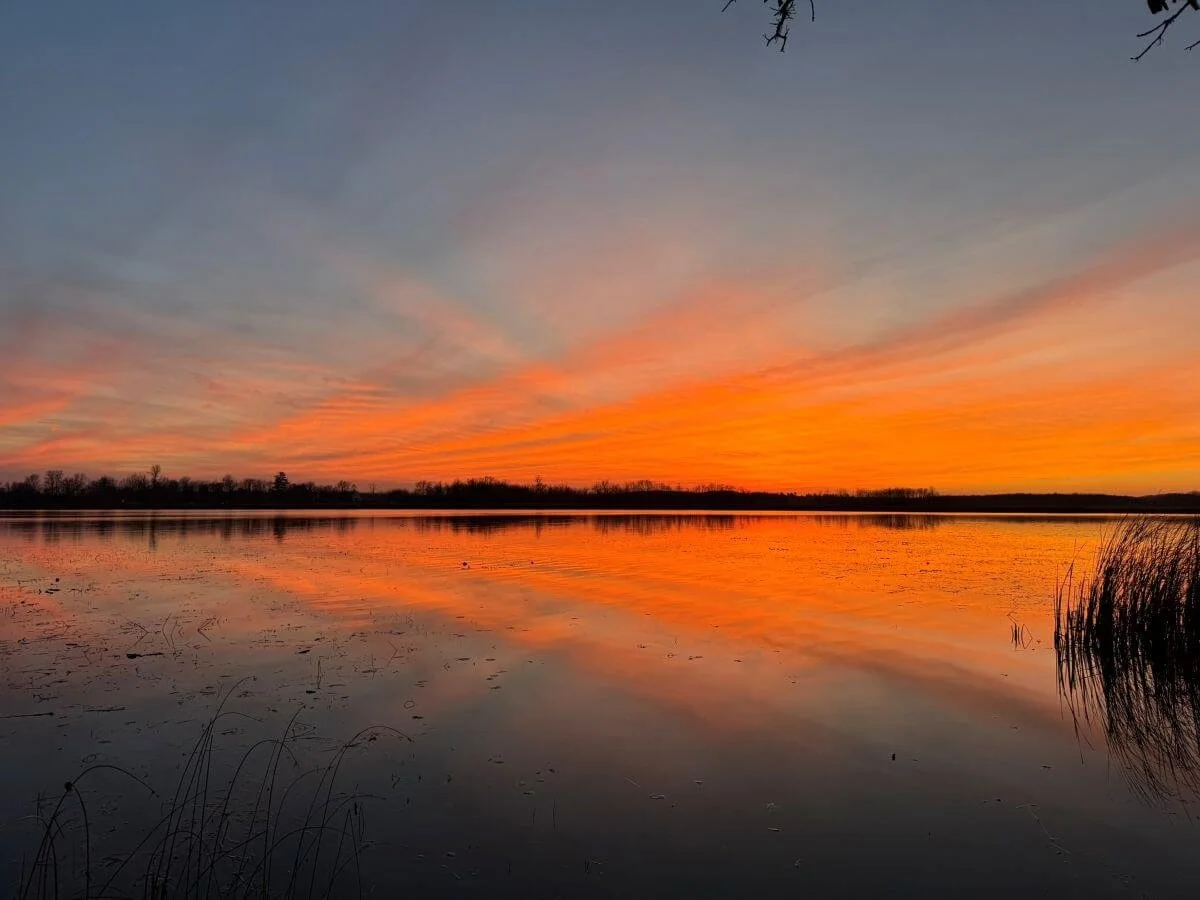
2 | Reflections at Sunset
As the sun sets for the day, take a minute to reflect on the year as this midpoint. What are you thankful for that’s transpired so far? And what do you want to accomplish during the second half of the year?
Nature’s Art
Nature Crafts that Sing Summertime
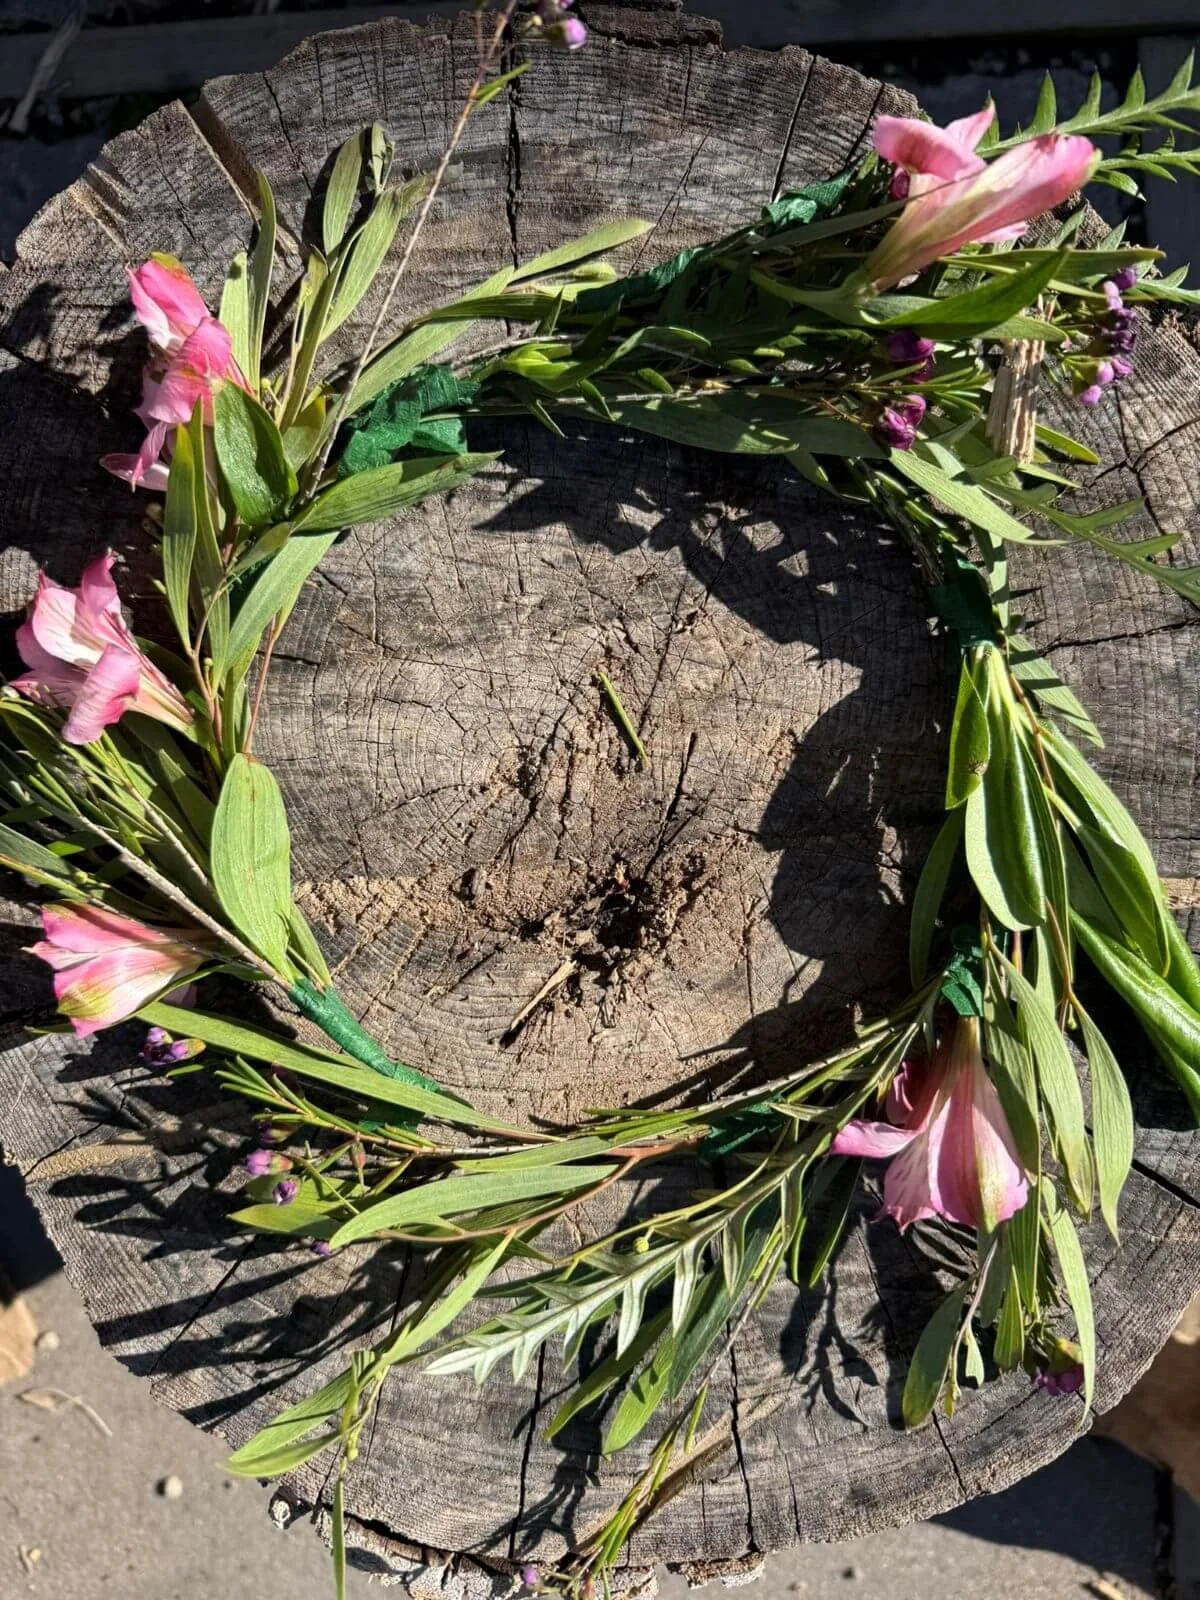
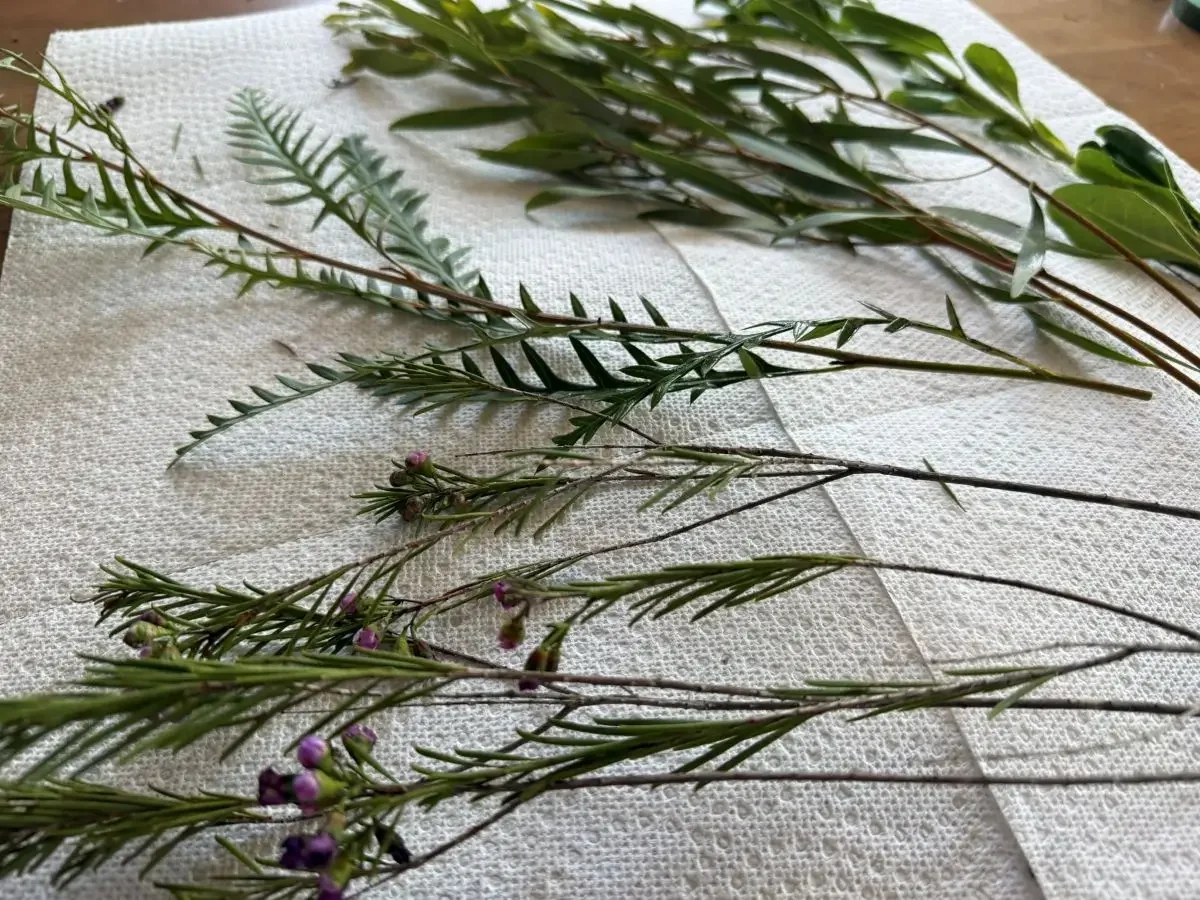
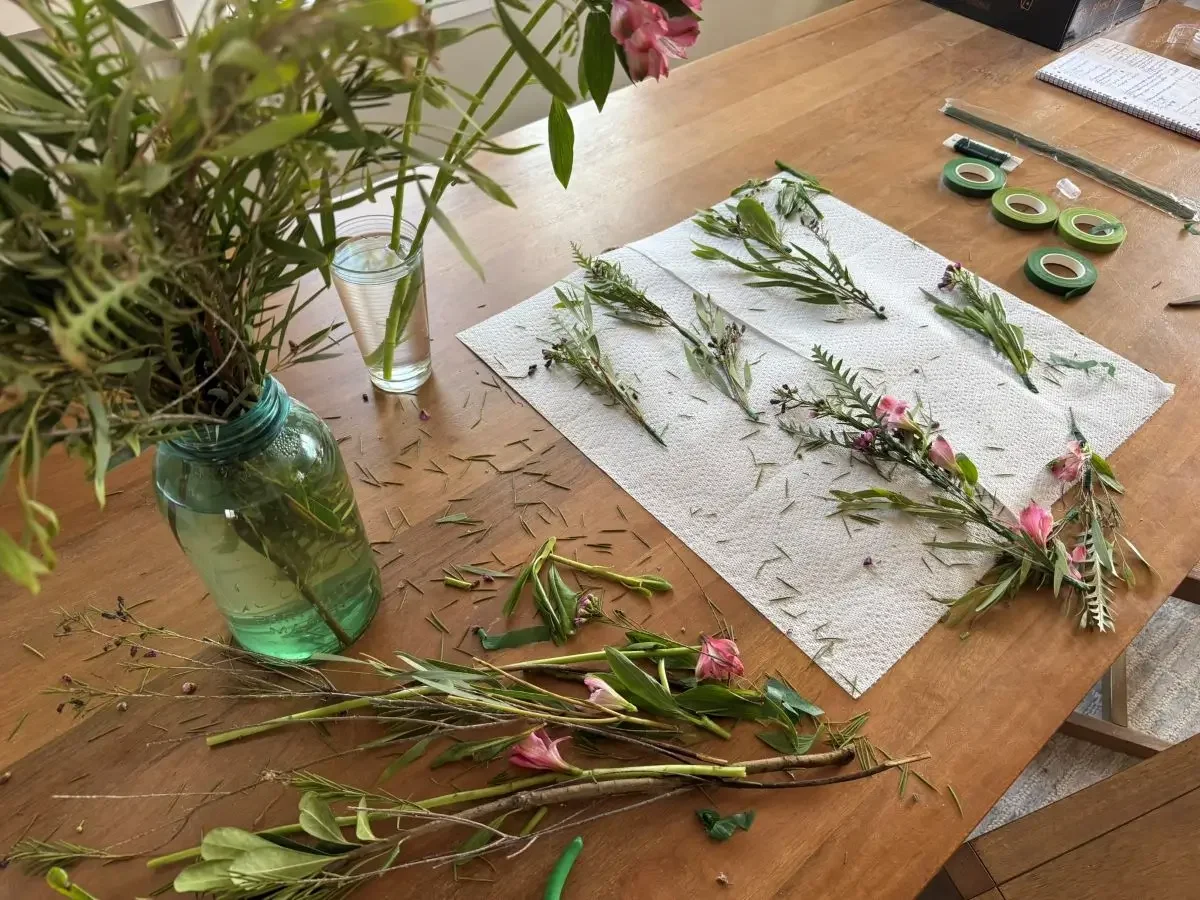
3 | Make a Floral Crown
Use the wild flowers, grasses and foliage, or flowers from your landscape to and make a floral crown.
Supplies:
Wild flowers & foliage of choice
Floral wire
Wire cutter
Instructions:
To add a sturdiness for easy removing and moving around, it can be helpful to create a few loops of the wire the size you want the crown to be, twisting the end around the wire itself. Twist the pieces together to form a stronger braid.
Use the floral tape to create bunches of buds or stems (like a boutonniere).
Tie the bunches to the wire loop using small pieces of wire.
Check the size of the loop before making it too big to ensure it will sit comfortably on the crown.

4 | Nature Print Making
Using your found items, you can create art prints using paint and cardstock to create negative-space prints.
Supplies:
Paint (can be acrylic, watercolor, etc.) (color of your choice, but if go with a lighter color or white if using a darker paper, and vice versa)
Art paint brushes (bigger is easier)
8”x10” frames
Instructions:
Paint one side of the object.
Arrange it painted side down on the paper as you wish (it could be an arrangement of multiple per sheet or a series of one shape per paper).
Place another piece of paper or paper towel over the object and use rolling pin to gently press evenly.
Remove the top sheet and discard and let dry before framing.

Eating & Drinking the Fruits of Summer
Refreshing summer recipes
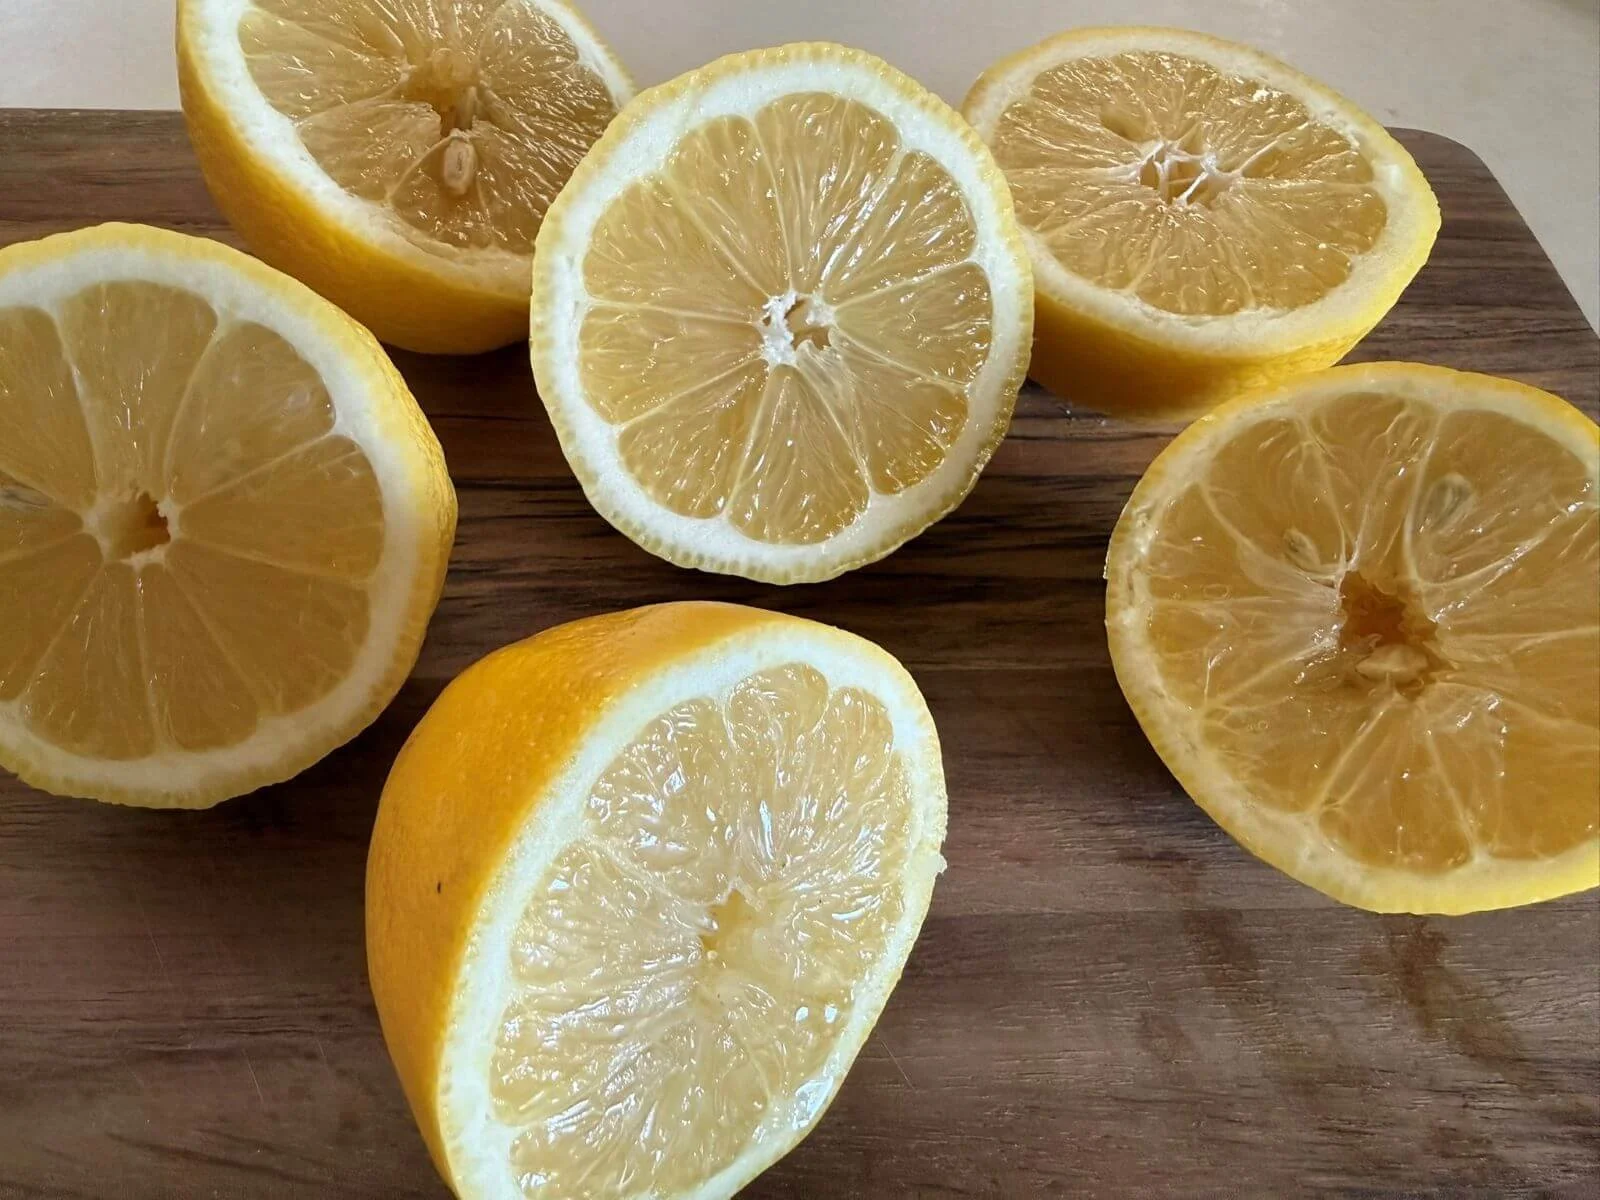
5 | Make Fresh Lemonade or Limeade
Freshly squeezed lemonade and Limeade are made the same way with a simple recipe below.
Ingredients:
3-4 Lemons or limes
1 cup Granulated sugar
6 cups Water
Instructions:
Make a simple syrup by combining 1 cup water and 1 cup sugar in a saucepan. Heat on medium-low until sugar is dissolved. Remove from heat for 10 minutes.
Cut and squeeze the lemons/limes into a pitcher.
Add the simple syrup and the remaining water. Pour over ice if enjoying immediately.
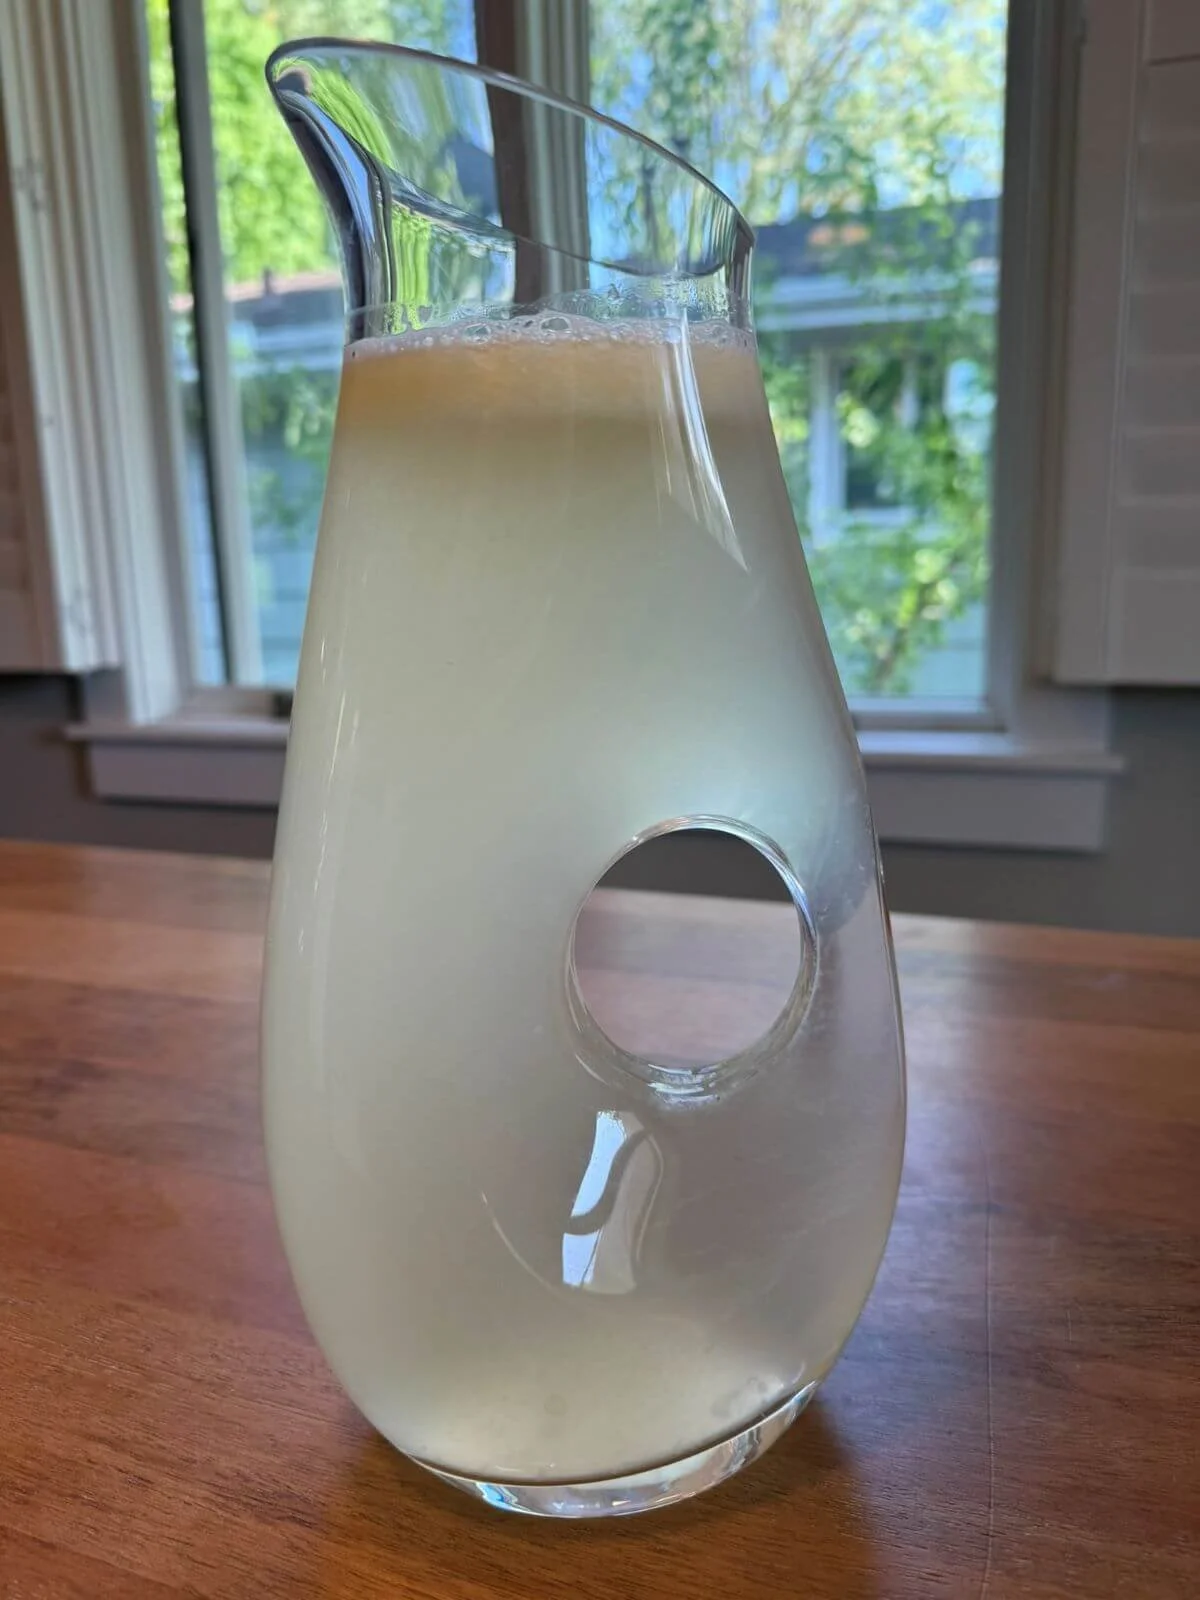
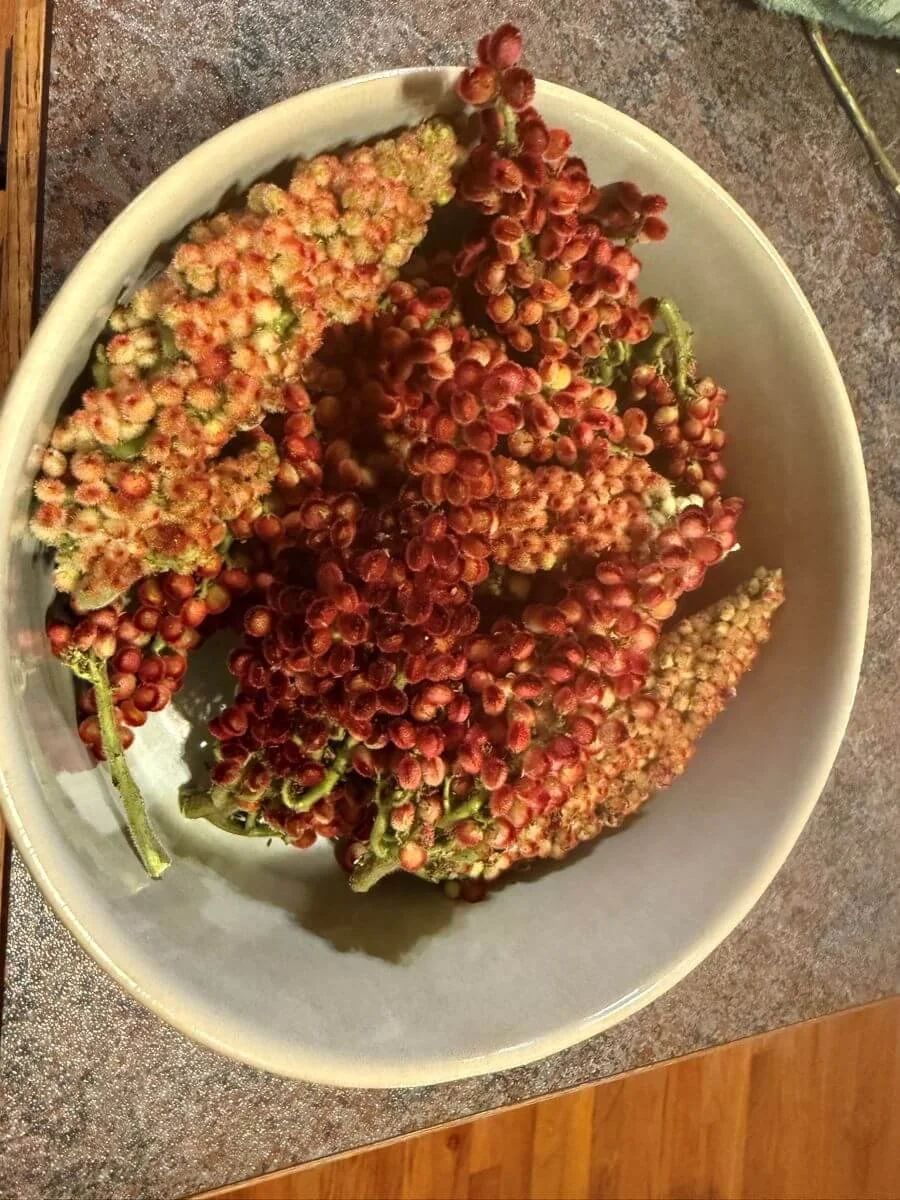
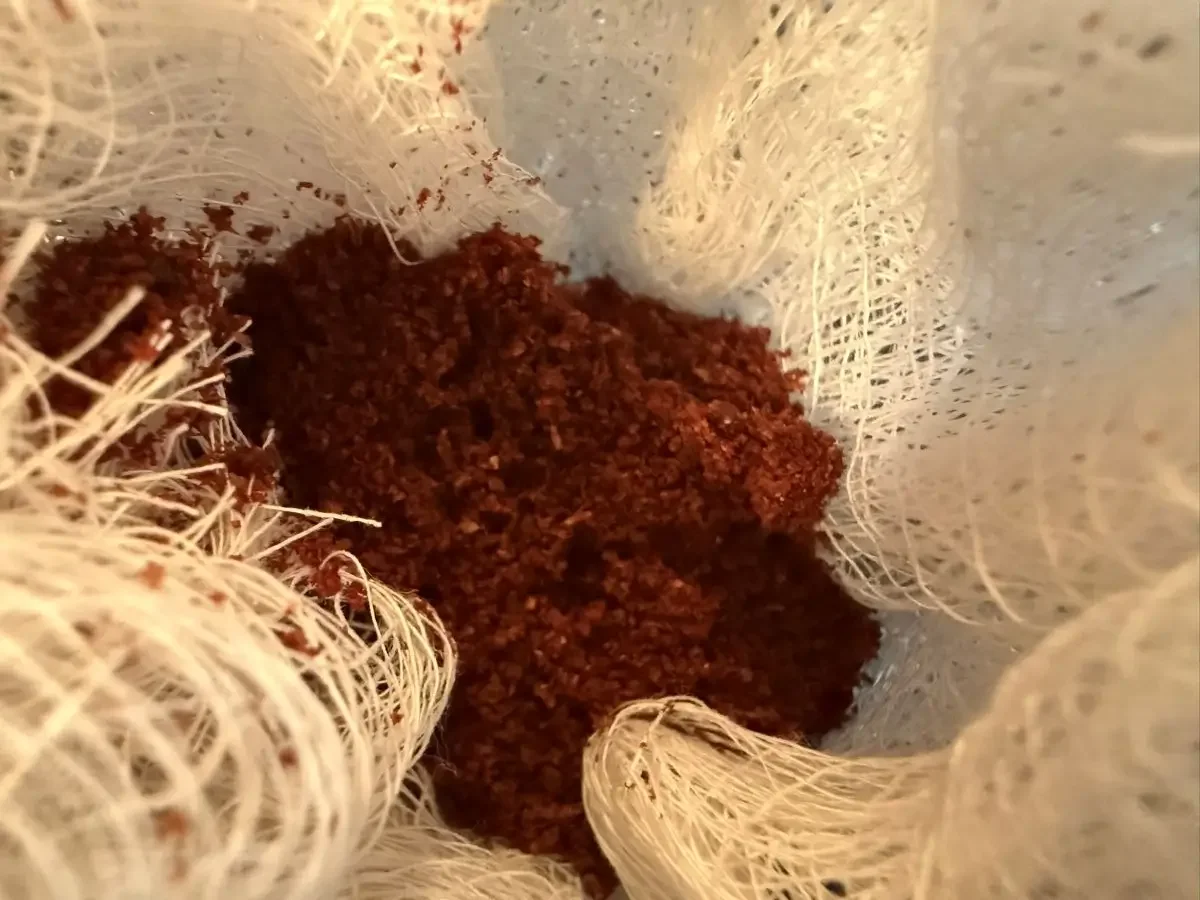
6 | Try Sumac Ade
Sumac Ade, also known by Sumac Punch, is a tangy, refreshing summer drink similar using foraged sumac berries. It’s been made for generations, originating with Native American tribes who used Sumac for Vitamin C-rich drink, medicine, and flavoring.
This recipe uses Staghorn Sumac- the kind found in backyards with the fuzzy red berries. There are other varieties of Sumac, some of which are poisonous. Avoid anything white or light green.
Ingredients/Supplies:
5-10 Large Staghorn Sumac clusters
5 cups Water
Granulated sugar (as suits your sweetness preference) - ½ cup/quart will match a typical lemonade; ¼ cup is a tarter version more akin to unsweetened or slightly sweetened iced tea.
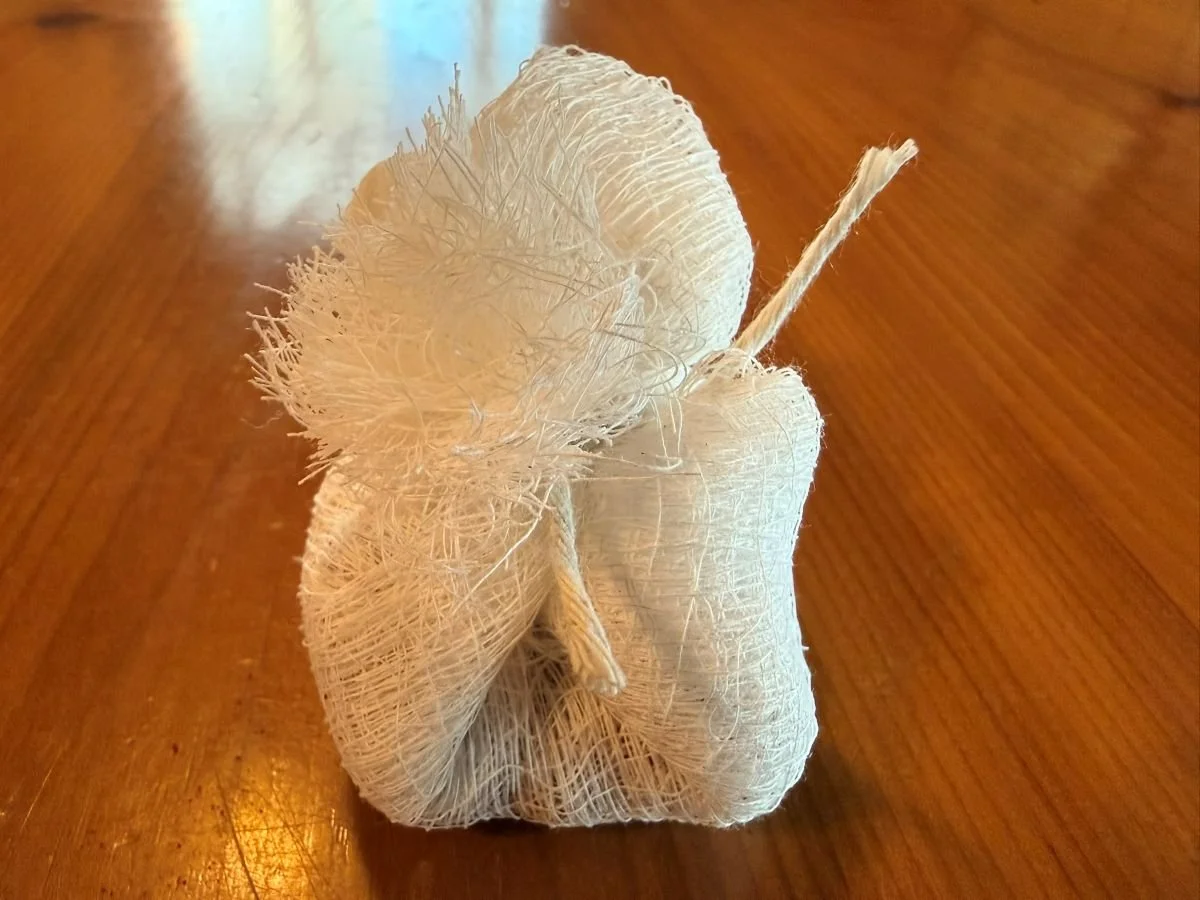
Cheesecloth
Sumac powder as alternate to fresh Sumac
Instructions:
Pick Sumac bunches (called drupes)
In a large bowl or large Ziplock bag, submerge Sumac in cool water. Crush and separate the berries underwater (don’t rinse them off beforehand in running water as this will remove much of the flavor).
Soak for at least a few hours- up to a couple days. The duration will impact the flavor with more steeping = stronger.
Strain the extract through the cheesecloth
Sweeten to tase
Serve over ice
If access to fresh Sumac is not an option, Sumac powder can also be used, for a quicker process.
Create a steeping satchel using cheesecloth. Fold it so that it’s 8-layers deep (it usually comes folded to be 4-ply already, so fold twice again). (You can also use a fine tea strainer) with 4 layers of cheesecloth inside.)
Add 2-3 Tablespoons Sumac powder (per quart of water) into the satchel and tie with string so that it’s tight.
Steep the satchel in cold water for 15-30 minutes. Pressing a spoon against the satchel can help express some of the sumac.
Strain again if needed though cheesecloth.
Sweeten with sugar.
Pour over ice and enjoy.

Magical Ways to Spend Time in Nature
Decor to Capture Summer Enchantment All Season Long
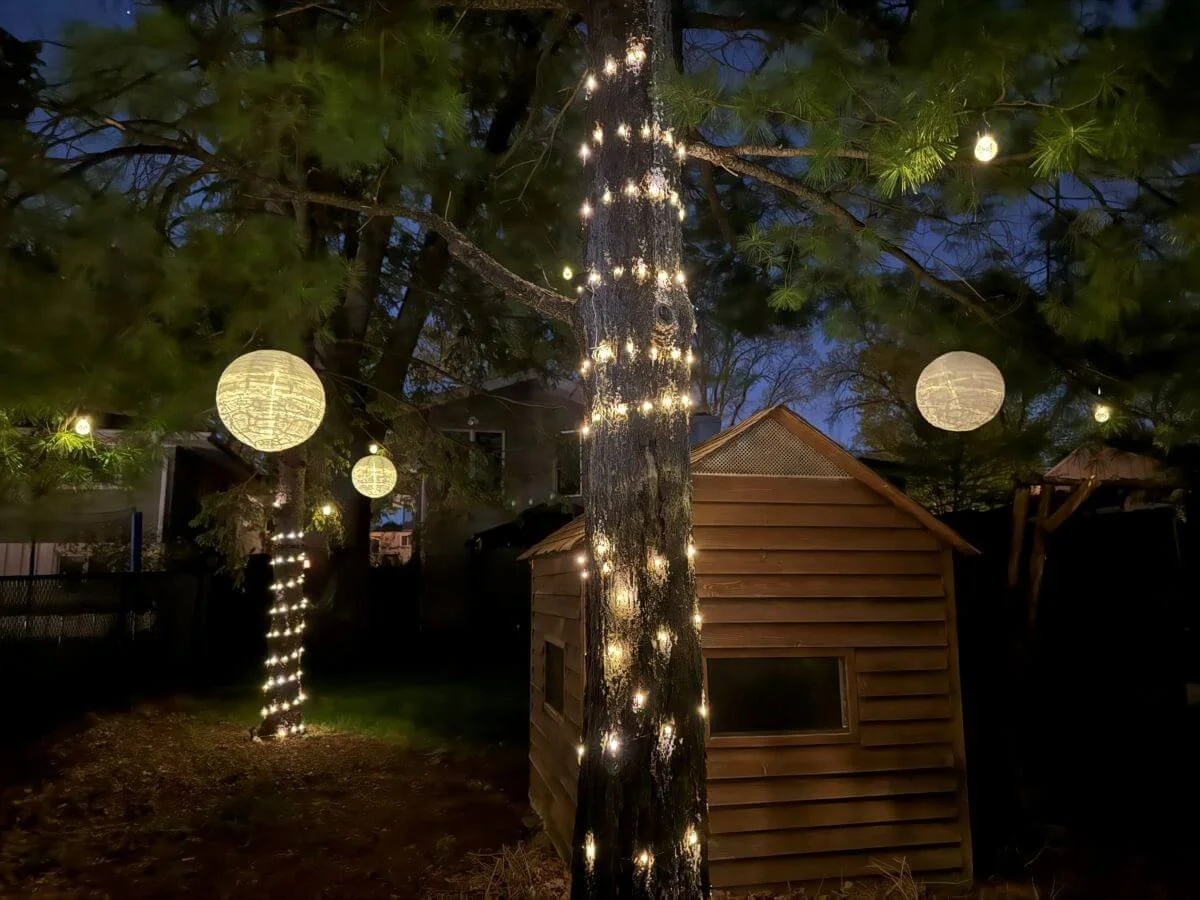
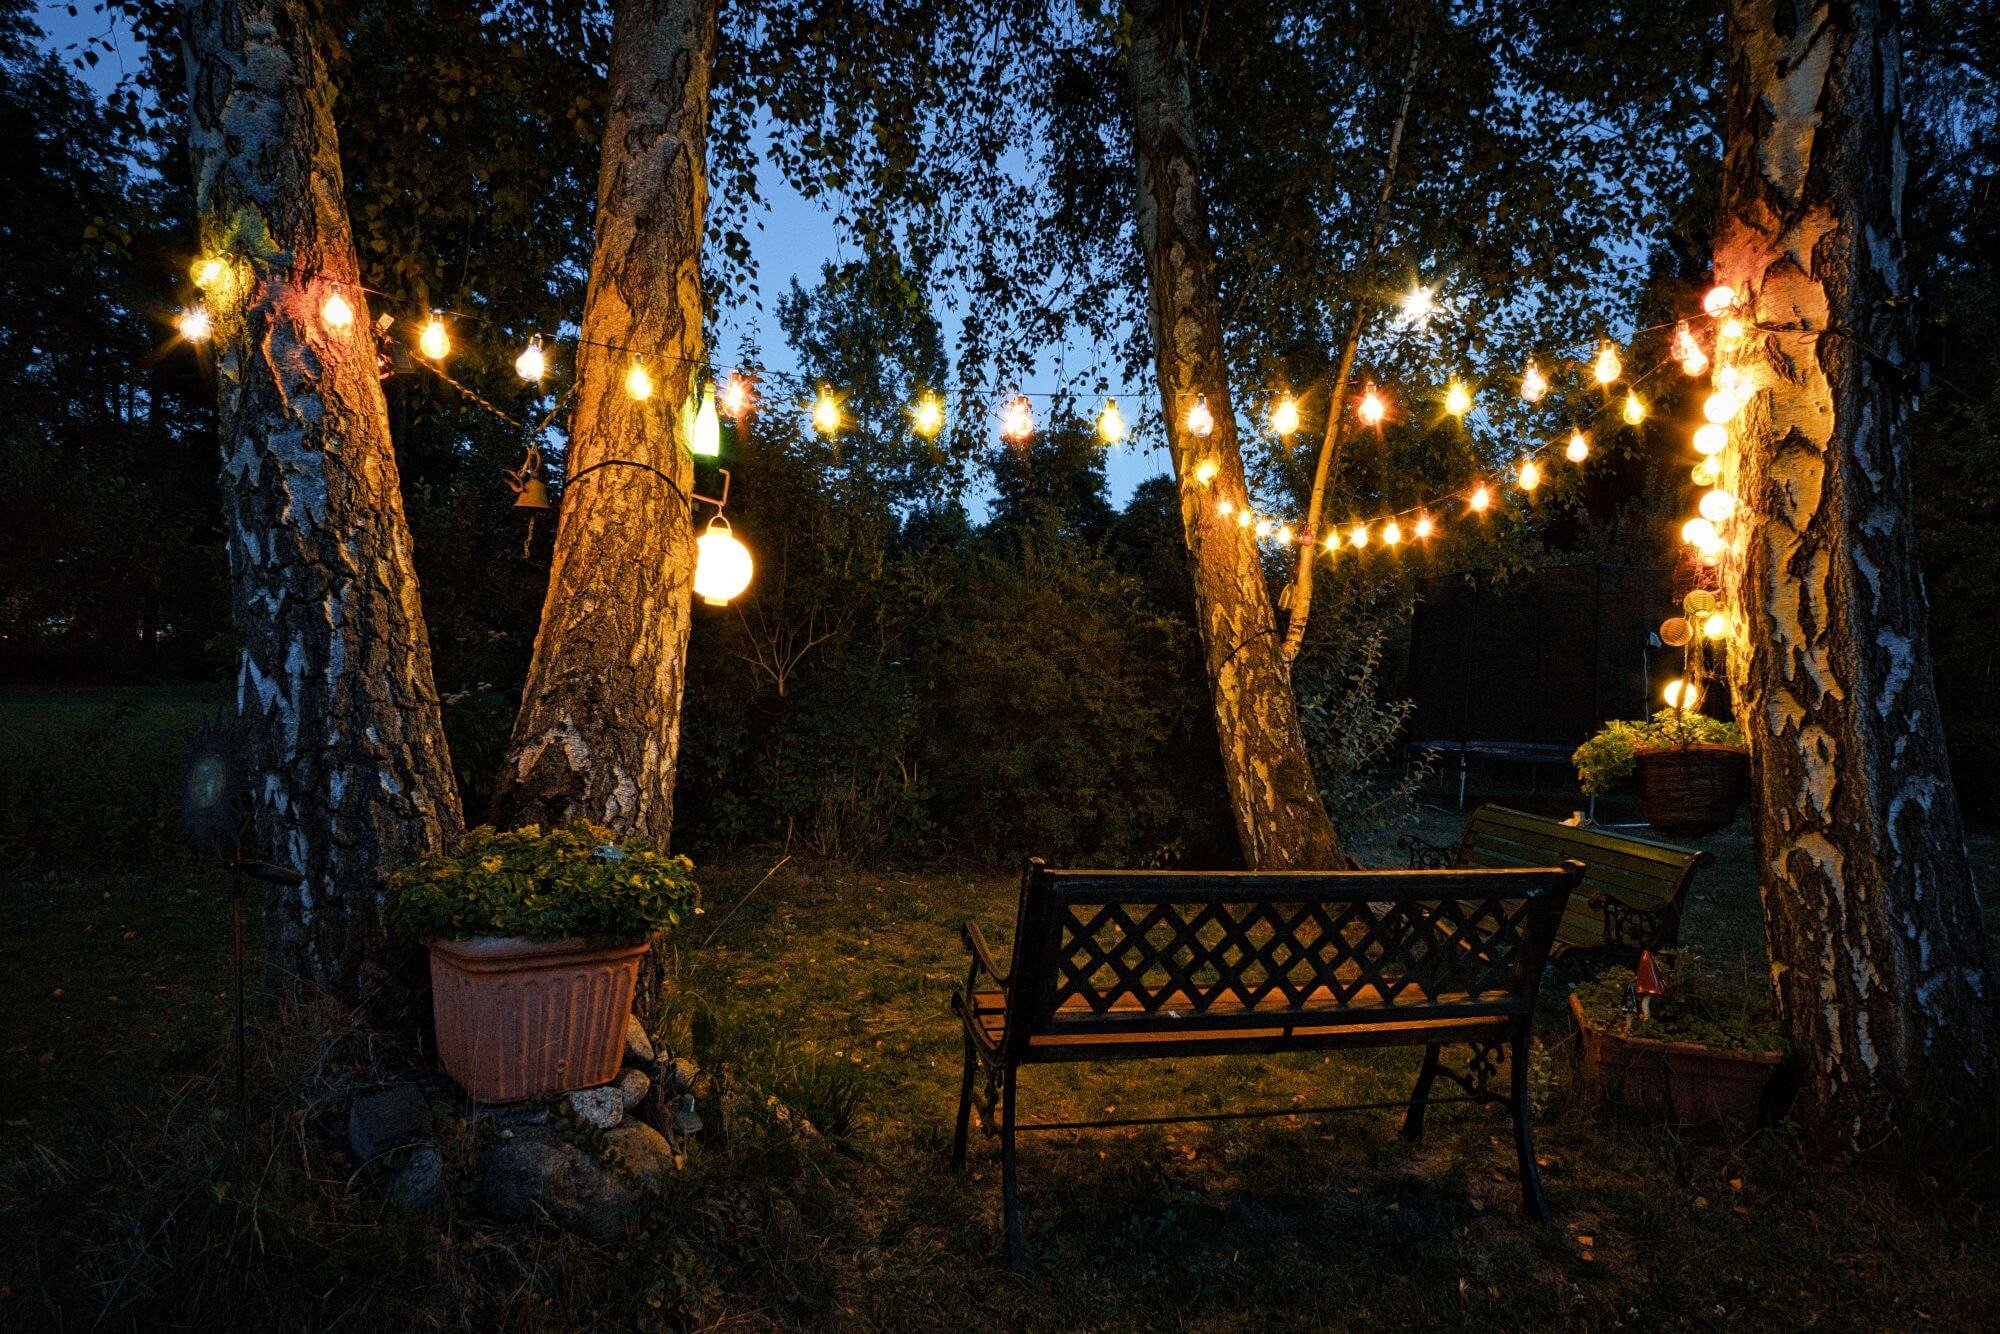
7 | Create an ethereal backyard
Channel the magic of Lightning Bugs and woodland fairytales to create an magic space that feels like it’s straight out of a Midsummer Night’s dream. Illuminate trees, or create patio accents using to create permanent ensembles that make you smile through all seasons.
A few different varieties:
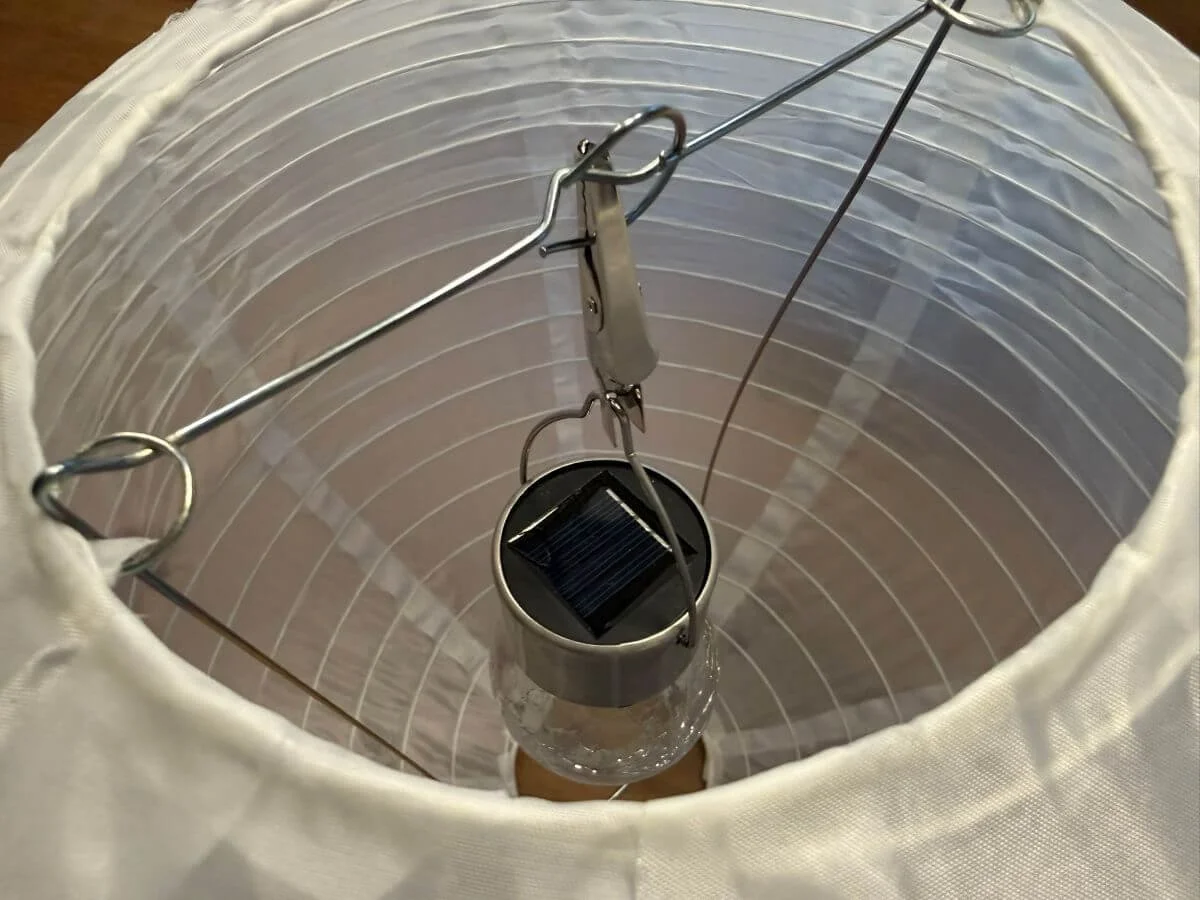
A) Illuminated paper lantern-style orbs & “lightning bugs”
Supplies:
Waterproof lanterns (these mimic the style of paper lanterns but are waterproof nylon)
Individual solar-powered LED hanging bulbs (the advantage of using solo bulbs is that they can be used sporadically within and around trees for a firefly-like appearance)
Fishing wire (optional, if needed)
Instructions:
Simply clip the individual LED bulbs inside of the lanterns to hang from the wire (1 bulb/lantern)
Hang lanterns where desired, either on a natural hook or branch, or use fishing wire to extend from a higher location.
It’s best to stick with odd numbers for the lanterns to give balance- so 3, or maybe 5, depending on the size you choose.
Hang the remaining bulbs alongst the tree boughs alongside the lanterns or if in a patio area wherever the clips will hang on to- aiming for a spaced but imperfect/organic look.
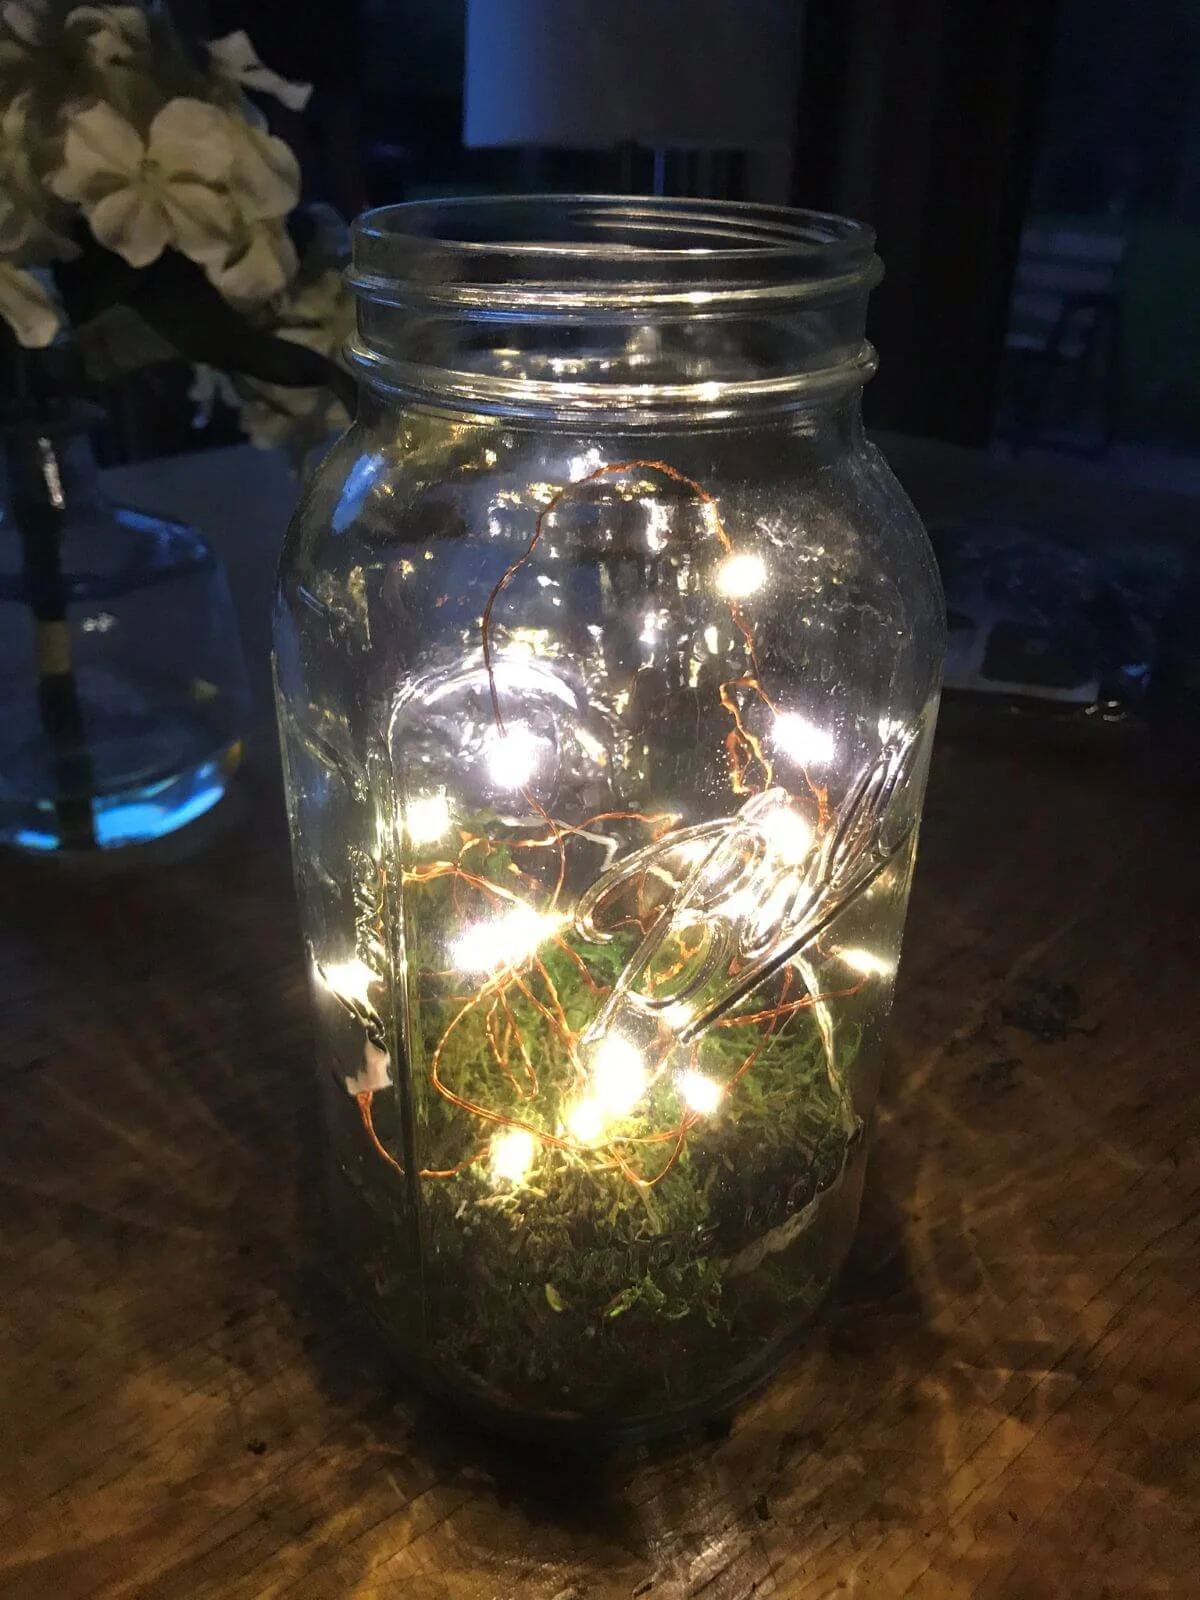
C) Lightning Bug Jars
Supplies:
Glass jar
Craft moss (optional)
Instructions:
Place moss in bottom of jar then add the string of lights
Can be done once as an accent on a side table, or as part of dining al fresco table decor, or as a collection- like lining a garden paver path.
If using outside, use the jar’s lid to cover securely to avoid ruining the moss and shortening the lifespan of the lights.
I highly recommend using fairy lights that come with a remote control. Otherwise, you will find yourself rarely taking the effort to dig into the jar to flip the switches on and off.
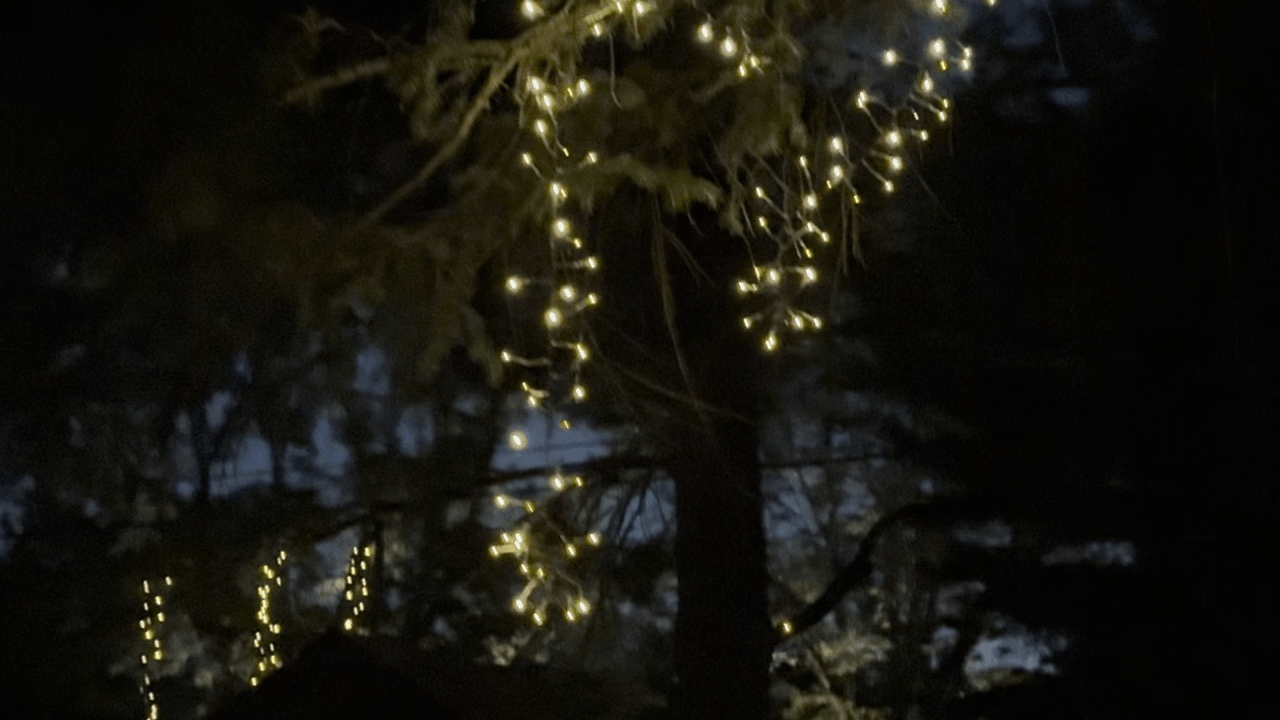
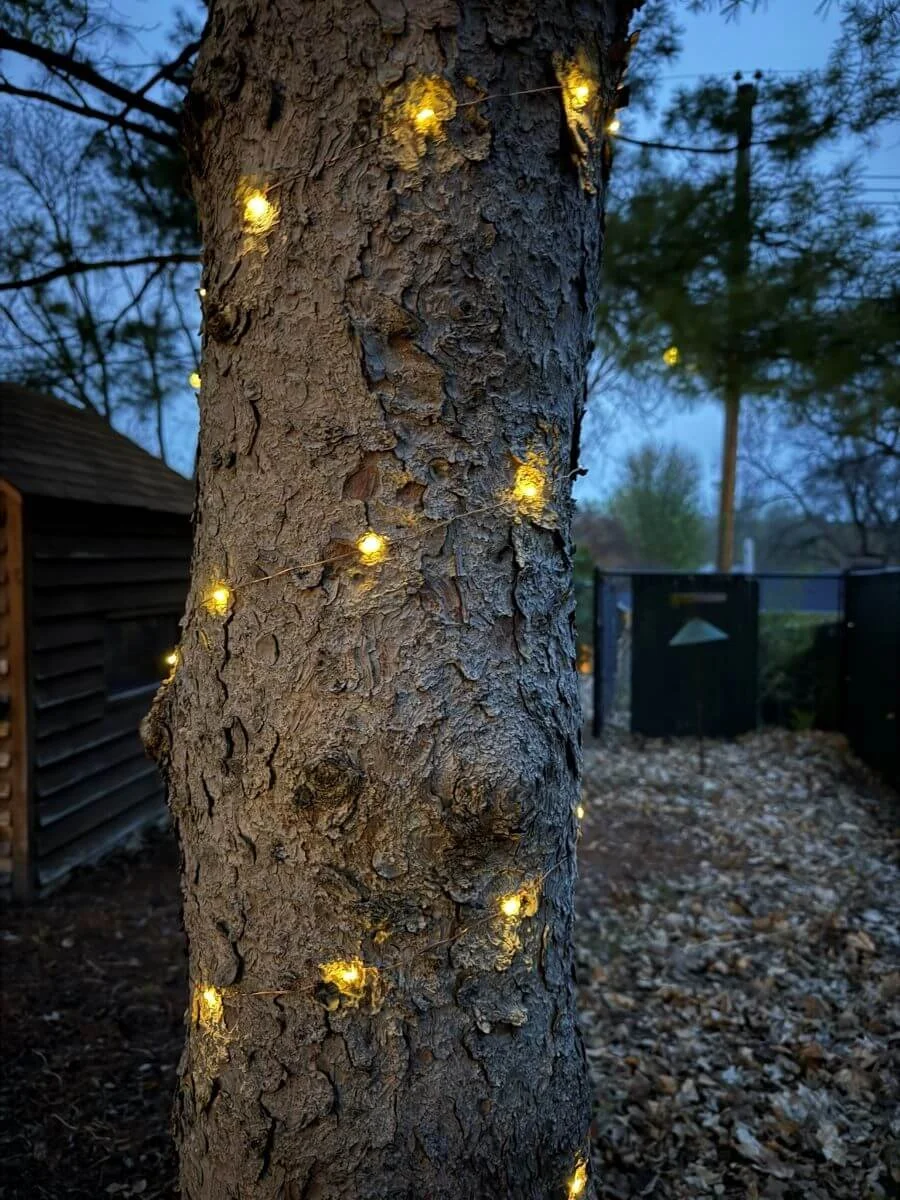
B) Fairy Lights & Waterfall lights
Supplies:
Solar-powered cascading “cluster” light strings (Note- these are different than the ‘icicle’ lights you see at the holidays and from ‘curtain’ lights. Any of these styles work- but I find the cluster lights are the most organic-looking.
Tip: Be sure to select a version with green wiring when using for pine trees and most deciduous trees, to blend in and have the focus be on the bulbs. White wire would work best on Paper Birch trees or light-bark desert varieties.
Clear zip ties (optional)
Instructions:
Use the fairy light strings to nestle into tree boughs or wrap around tree trunks.
If wrapping, go snug enough that the wire won’t fall, but keep it loose enough that the tree can grow without growing into the wire, enough for a couple seasons.
For the cascading variety, place along the tops of boughs and let hang down naturally. Clear zip ties are great here to secure occasionally to keep in place during bad weather. Ours have lasted five five years now!
For either variety- start from the bottom up- figuring out where you will place the solar panel first before you start placing the wire. Pick a good spot that will get the most sunlight, and don’t be constrained by staking into the ground. Many kits have spots where you can screw into a hard surface instead- including wood from tree trunks!
Remember to flip the ‘on’ switch and select the mode you want, especially if securing up the trunk.
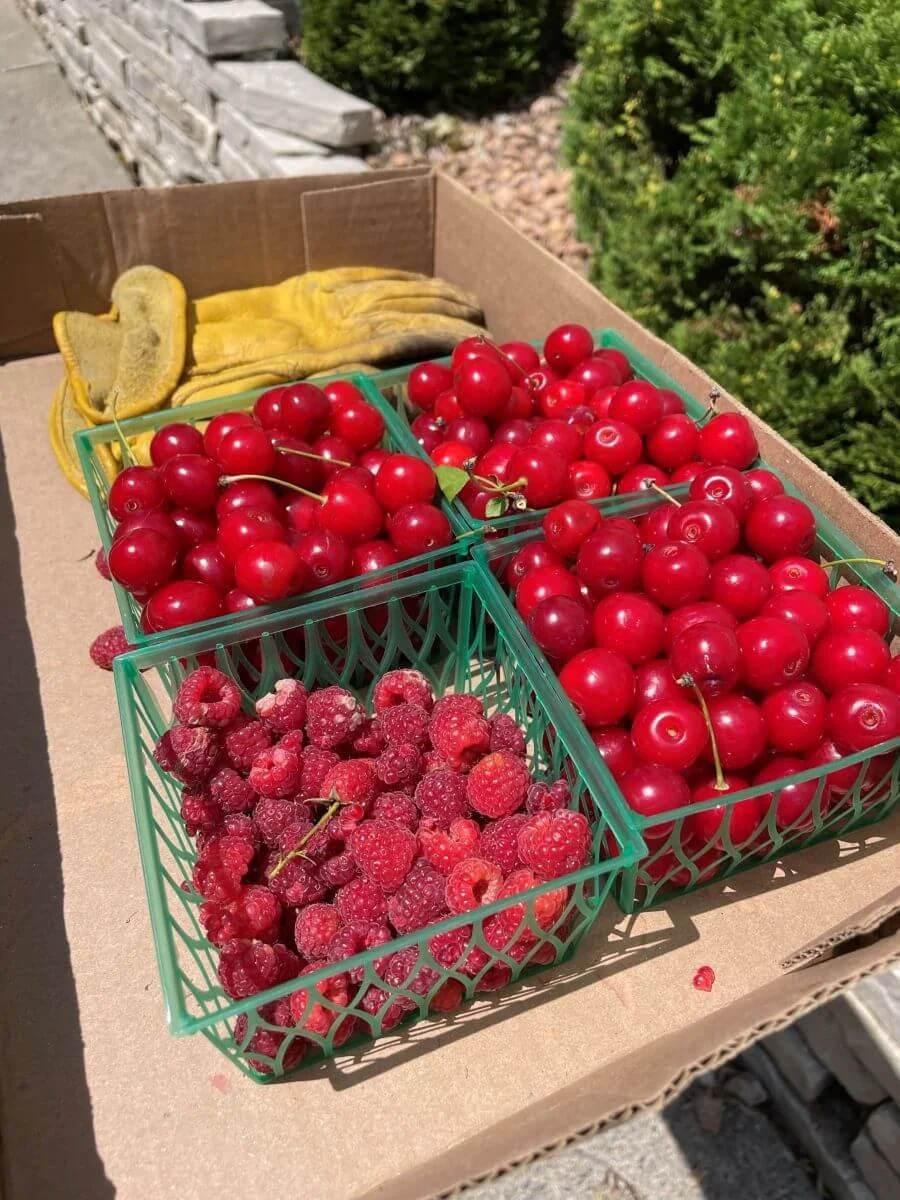
8 | Go Berry Picking
Depending on where you live, late June could mean peak season for strawberries, raspberries, or even blueberry or blackberries. Sure- it may cost as much as going to the grocery store- but it’s the experience of being out in nature and the reward is sure to be much riper and better tasting.
Tip: Call ahead once you find a place to ask what’s in season and ensure there’s good picking that week/day, and bring a basket or buckets you have around the house to transport your treasure back home.
9 | Pack a Picnic
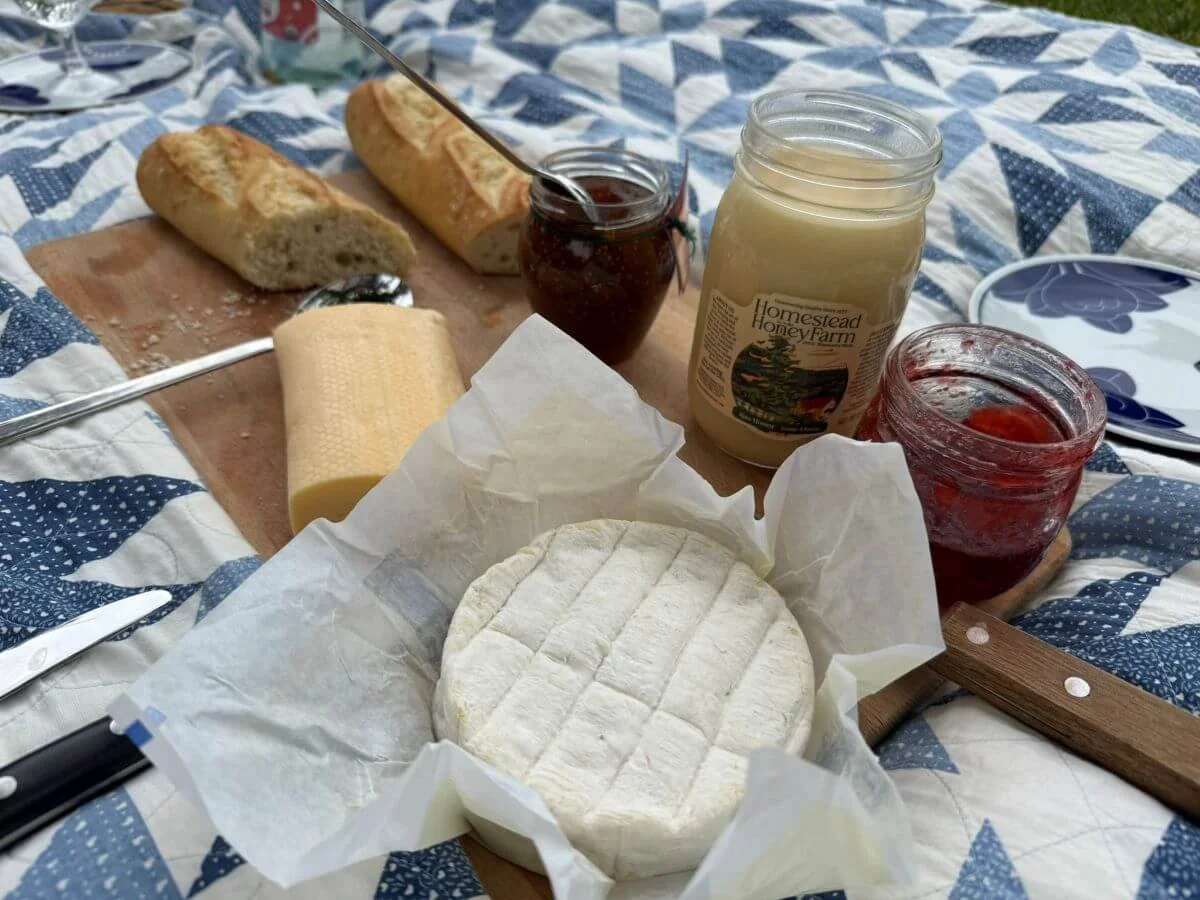
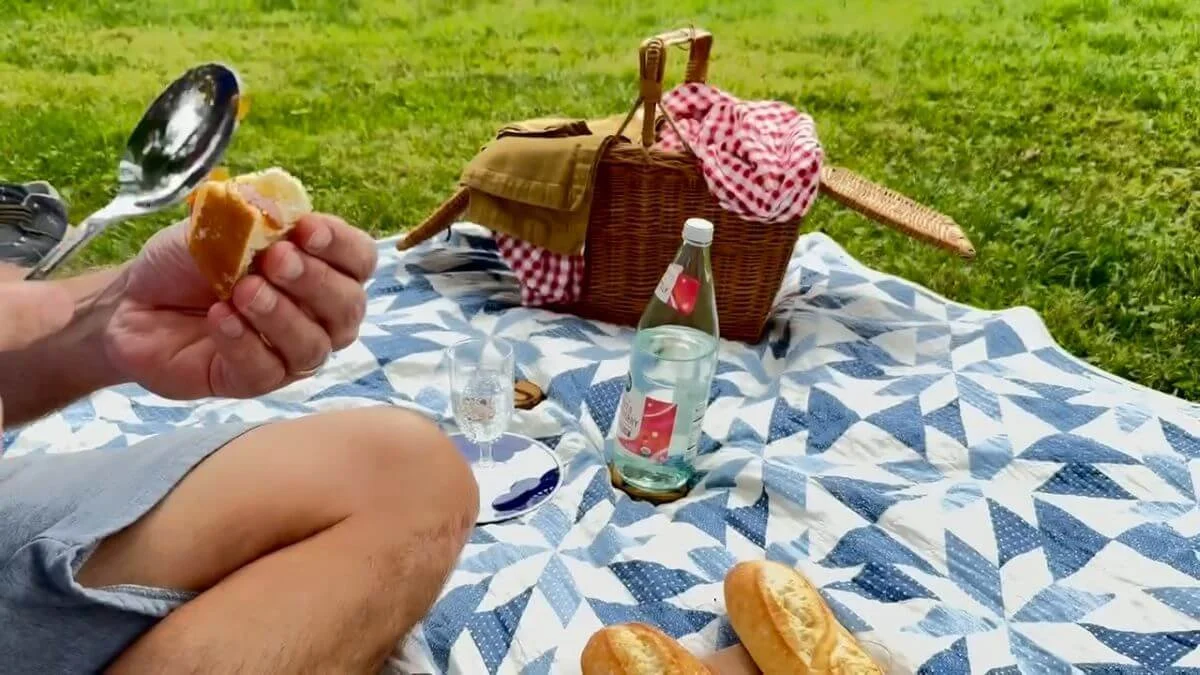
Even if it’s in your backyard!

10 | A Walk in Nature
Go for a walk outside, even better in a park or nearby local woods.
If up for activities #3 or #4- gather wild flowers, grasses and foliage, even weeds and dandelions while you walk. They can make a lovely simple floral bouquet also. If you see Sumac- take note of Activity #6!
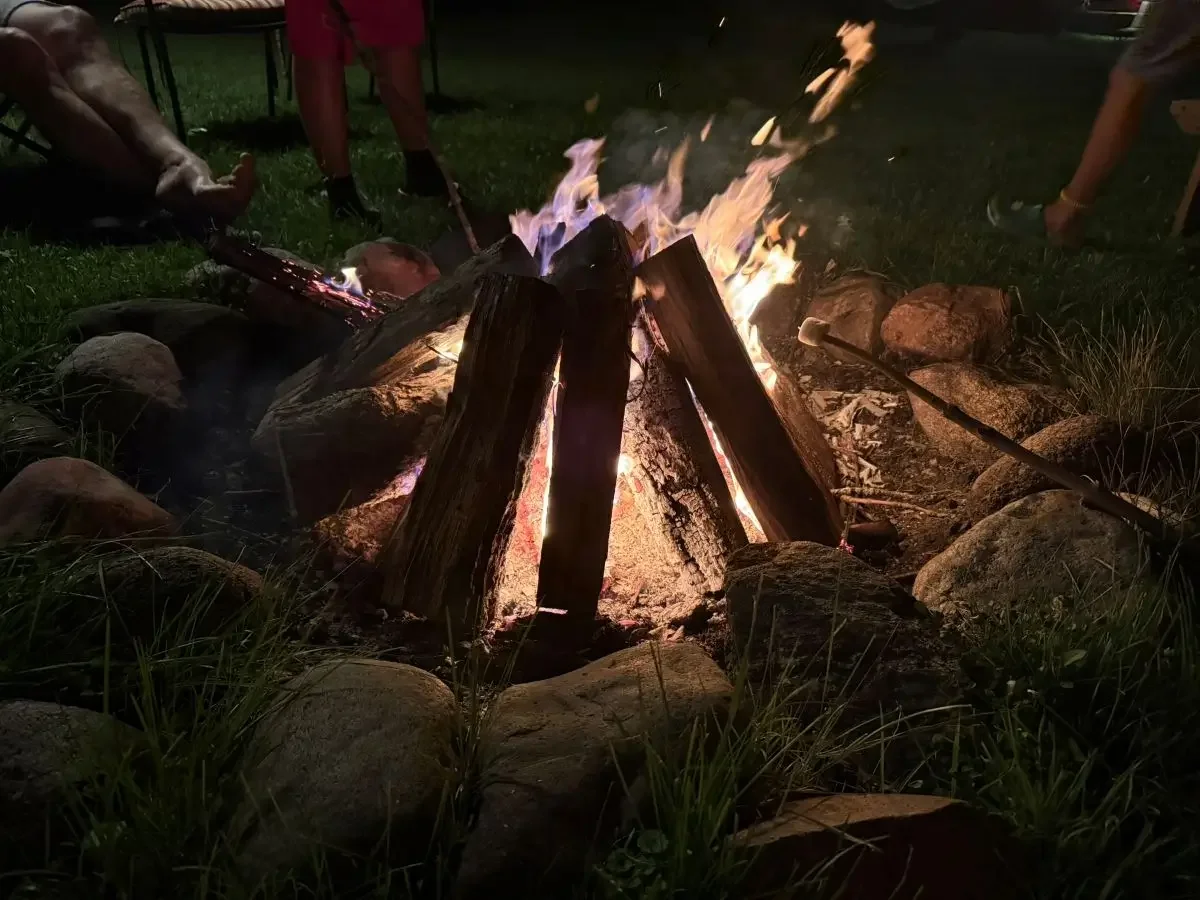
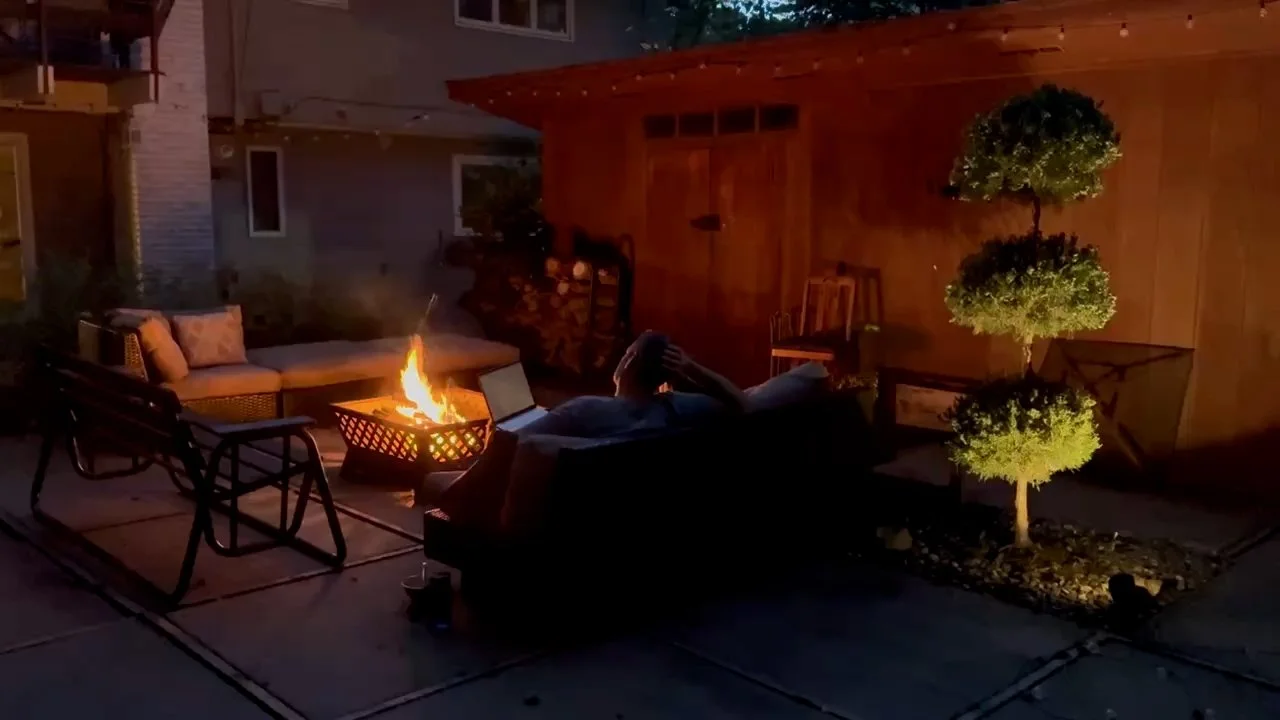
11 | Have a bonfire
Bonfires have a central place in celebrations of ‘MidSummer’ celebrated across many cultures across the globe. In Nordic lore, the bigger the bonfire the more your crops were protected against bad spirits. Invite friends over or enjoy with your family to protect the many blessings in your life, and enjoy the warm embrace of the fires against cooling blue fading and lavender sky.
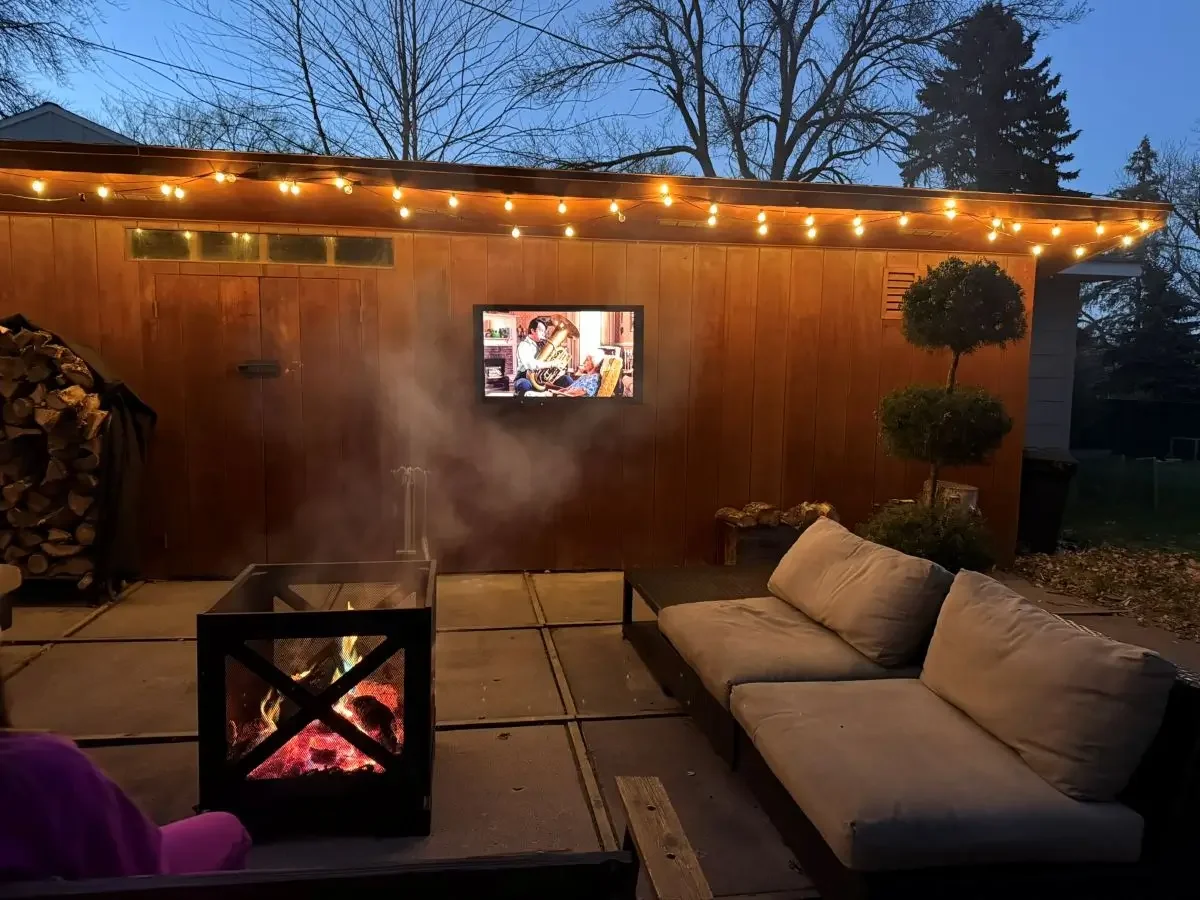
12 | Watch an outdoor movie
Watch a great story from your enchanted garden, or around the bonfire. Here are a couple classic and nostalgic storylines that invoke the intangible sweetness of summer.
A Midsummer Night’s Dream (1999)
The Secret Garden (1993)
Shakespeare in Love (1998)
Or if looking for something less Shakespearean but summer magical in a different way:
Dirty Dancing (1987)
Stand by Me (1986)
Now and Then (1995)
For a quick set-up and a small group (like just you or the family)- you could bring out a laptop + blue tooth speaker.
For easier view, hosting a larger group, or wanting a season-long solution, another option is actually mounting a TV in your outdoor space. We did this with an older tv that we weren’t using, and it’s been going strong for 6 summer/falls now- even in Minnesota where there’s plenty humidity. Just make sure it’s mounted under an alcove or something to prevent direct rain and weather.
You can buy water-proof tvs but they’re wildly expensive in the thousands of dollars. For an older non-smart tv- you’ll need a Firestick or Roku (turns your tv into a smart tv), but more modern tvs just need a wifi signal, which is usually plenty strong from your router. If you have a large backyard and the entertaining space is a ways away, you might benefit from a wifi booster. All in all, it’s still a very affordable solution for great outdoor viewings.
Supplies:
Bluetooth speaker
Option A) Laptop
Option B)
TV
Adjustable tv mount
Roku or Firestick (only if not a smart-tv)
Wifi booster (only if needed)
Go out and enjoy the longest day of the year from dawn to dusk!
Continue the mood:
12 Summer Camp Ideas That Feel Like Childhood (Full Thematic Track)
Individual Projects: